When people are looking for a home, they want to have a sense of what it will look like furnished. The staged houses actually sell 73% faster than their unstaged counterparts.
But how can you give both your builders and your future clients a deep and accurate picture of an unfinished space? With a virtual reality 3D rendering, everything is possible.
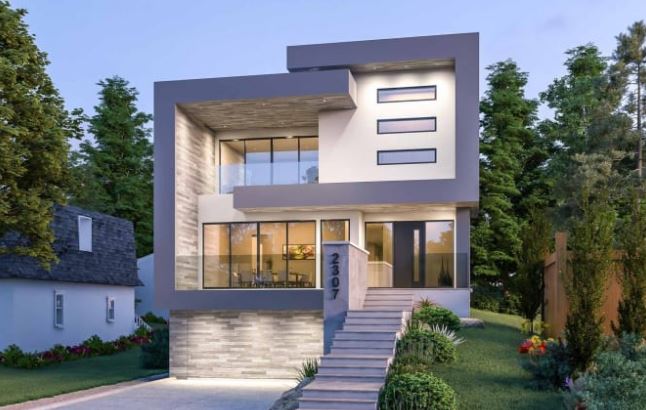
1. WHAT IS A 3D RENDERING?
A 3D virtual rendering is a detailed, digitally created environment that shows your finished project. It is a design plan used to stage, display, and visualize homes and spaces before construction is complete. Whether you’re working on your floorplan and layout, fine-tuning your interior design, or looking for marketing material for your space, with a virtual rendering, you can explore and advertise every detail of your future retirement community.
2. BENEFITS OF A 3D RENDERING FOR YOUR RETIREMENT COMMUNITY
No matter where you are in the construction process, or what kind of client you’re trying to attract, a 3D rendering will open doors early for your retirement community project. With a stunning, detailed, high-quality virtual plan, you’re able to:
- See your entire completed space, exactly how it will look.
- Touch up and adjust your design for better final results.
- Experiment with different design styles and interior design elements for your finished space.
- Create a virtual tour to show potential residents what your community will look like.
- Use 3D rendering stills and scenes for marketing materials.
3. HOW TO DESIGN A 3D RENDERING FOR YOUR RETIREMENT COMMUNITY?
From your floor plans, files, and personal designs, we can create custom renderings through the following process:
- Camera Selections and Environment Building: Start by rendering clay scenes as a preview, using multiple camera angles and preliminary lighting to create an initial environment for your approval.
- Asset and Material Coordination: Next, add specified models and materials to render your space in more detail, refine the lighting, and double-check accuracy.
- Final Staging and Production: After confirming the accuracy of the layout and materials with you, we render the scene with furniture, decorations, and other design elements.
- Post-Processing: Lastly, add finishing touches like color adjustments, skies, background, and entourage to bring the environment to life.